using_gridmaps
Using GridMaps
Introduction
Gridmaps are a tool for creating 3D game levels, similar to the way TileMap works in 2D. You start with a predefined collection of 3D meshes (a class_MeshLibrary) that can be placed on a grid, as if you were building a level with an unlimited amount of Lego blocks.
Collisions and navigation can also be added to the meshes, just like you would do with the tiles of a tilemap.
Example project
To learn how GridMaps work, start by downloading the sample project: gridmap_starter.zip.
Unzip this project and add it to the Project Manager using the "Import" button.
Creating a MeshLibrary
To begin, you need a class_MeshLibrary, which is a collection of individual meshes that can be used in the gridmap. Open the "mesh_library_source.tscn" scene to see an example of how to set up the mesh library.
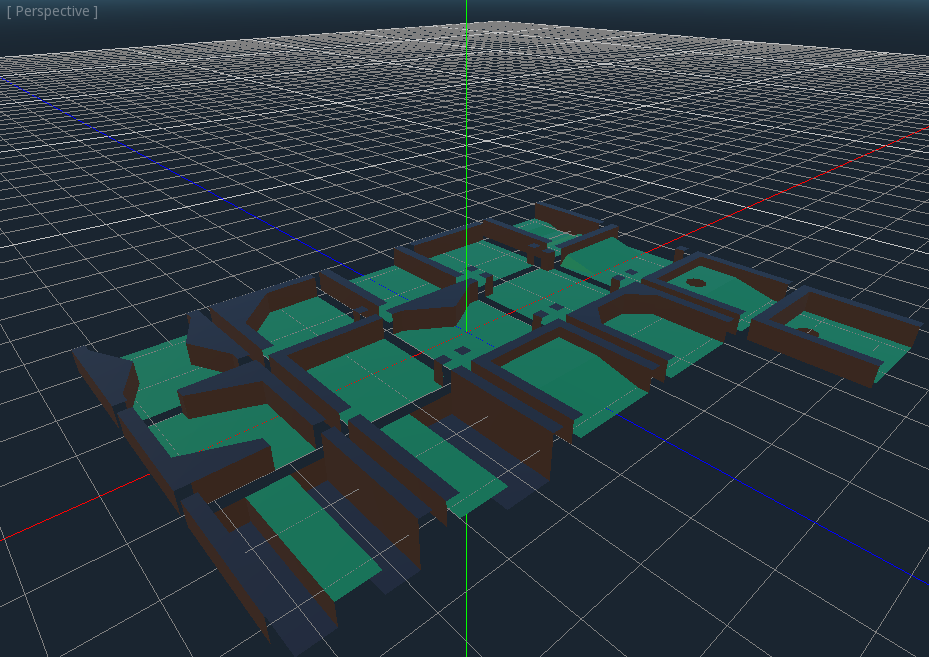
As you can see, this scene has a class_Node3D node as its root, and a number of class_MeshInstance3D node children.
If you don't need any physics in your scene, then you're done. However, in most cases you'll want to assign collision bodies to the meshes.
Collisions
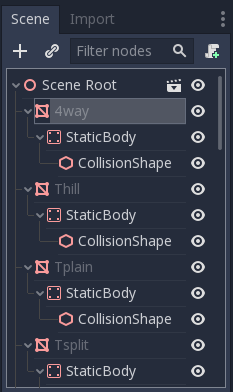
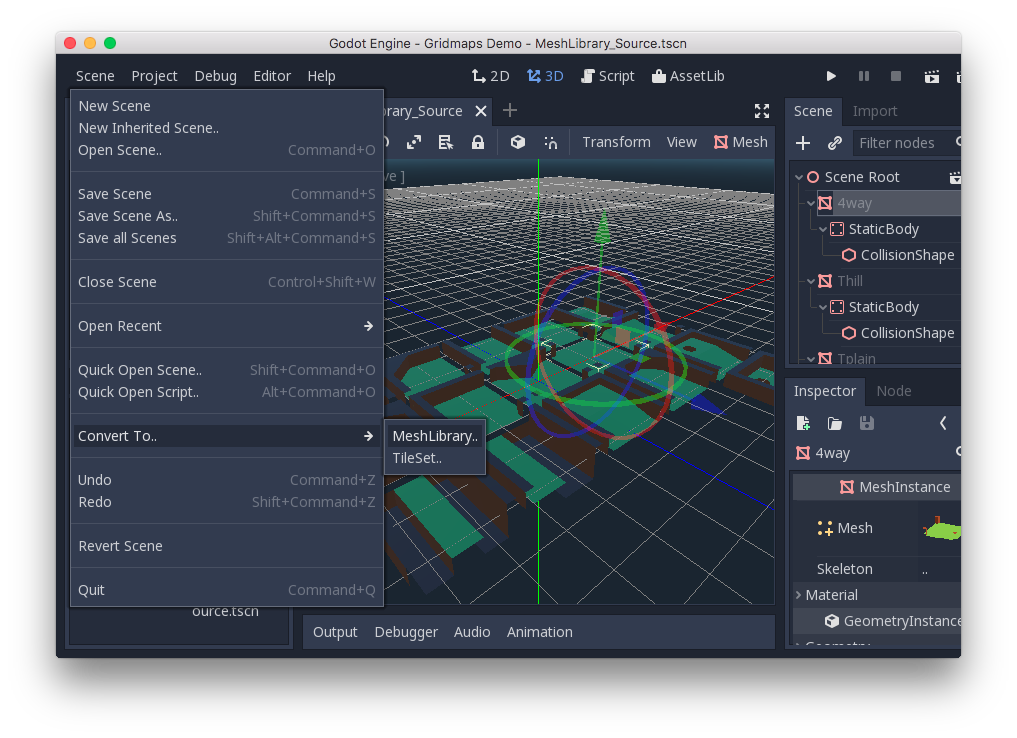
You can manually assign a class_StaticBody3D and class_CollisionShape3D to each mesh. Alternatively, you can use the "Mesh" menu to automatically create the collision body based on the mesh data.

Note that a "Convex" collision body will work better for simple meshes. For more complex shapes, select "Create Trimesh Static Body". Once each mesh has a physics body and collision shape assigned, your mesh library is ready to be used.
Materials
Only the materials from within the meshes are used when generating the mesh library. Materials set on the node will be ignored.
NavigationMeshes
Like all mesh instances, MeshLibrary items can be assigned a class_NavigationMesh resource, which can be created manually, or baked as described below.
To create the NavigationMesh from a MeshLibrary scene export, place a class_NavigationRegion3D child node below the main MeshInstance3D for the GridMap item. Add a valid NavigationMesh resource to the NavigationRegion3D and some source geometry nodes below and bake the NavigationMesh.
With small grid cells it is often necessary to reduce the NavigationMesh properties for agent radius and region minimum size.

Nodes below the NavigationRegion3D are ignored for the MeshLibrary scene export, so additional nodes can be added as source geometry just for baking the navmesh.
The baked cell size of the NavigationMesh must match the NavigationServer map cell size to properly merge the navigation meshes of different grid cells.
MeshLibrary format
To summarize the specific constraints of the MeshLibrary format, a MeshLibrary scene has a Node3D as the root node, and several child nodes which will become MeshLibrary items. Each child of the root node should:
- Be a class_MeshInstance3D, which will become the MeshLibrary item. Only this visual mesh will be exported.
- Have a material, in the mesh's material slot, not the MeshInstance3D's material slots.
- Have up to one class_StaticBody3D child, for collision. The StaticBody3D should have one or more class_CollisionShape3D children.
- Have up to one class_NavigationRegion3D child, for navigation. The NavigationRegion3D can have one or more additional class_MeshInstance3D children, which can be baked for navigation, but won't be exported as a visual mesh.
Only this specific format is recognized. Other node types placed as children will not be recognized and exported. GridMap is not a general-purpose system for placing nodes on a grid, but rather a specific, optimized system, designed to place meshes with collisions and navigation.
Exporting the MeshLibrary
To export the library, click on Scene > Export As... > MeshLibrary..., and save it as a resource.
You can find an already exported MeshLibrary in the project named "MeshLibrary.tres".
Using GridMap
Create a new scene and add a GridMap node. Add the mesh library by dragging the resource file from the FileSystem dock and dropping it in the "Theme" property in the Inspector.
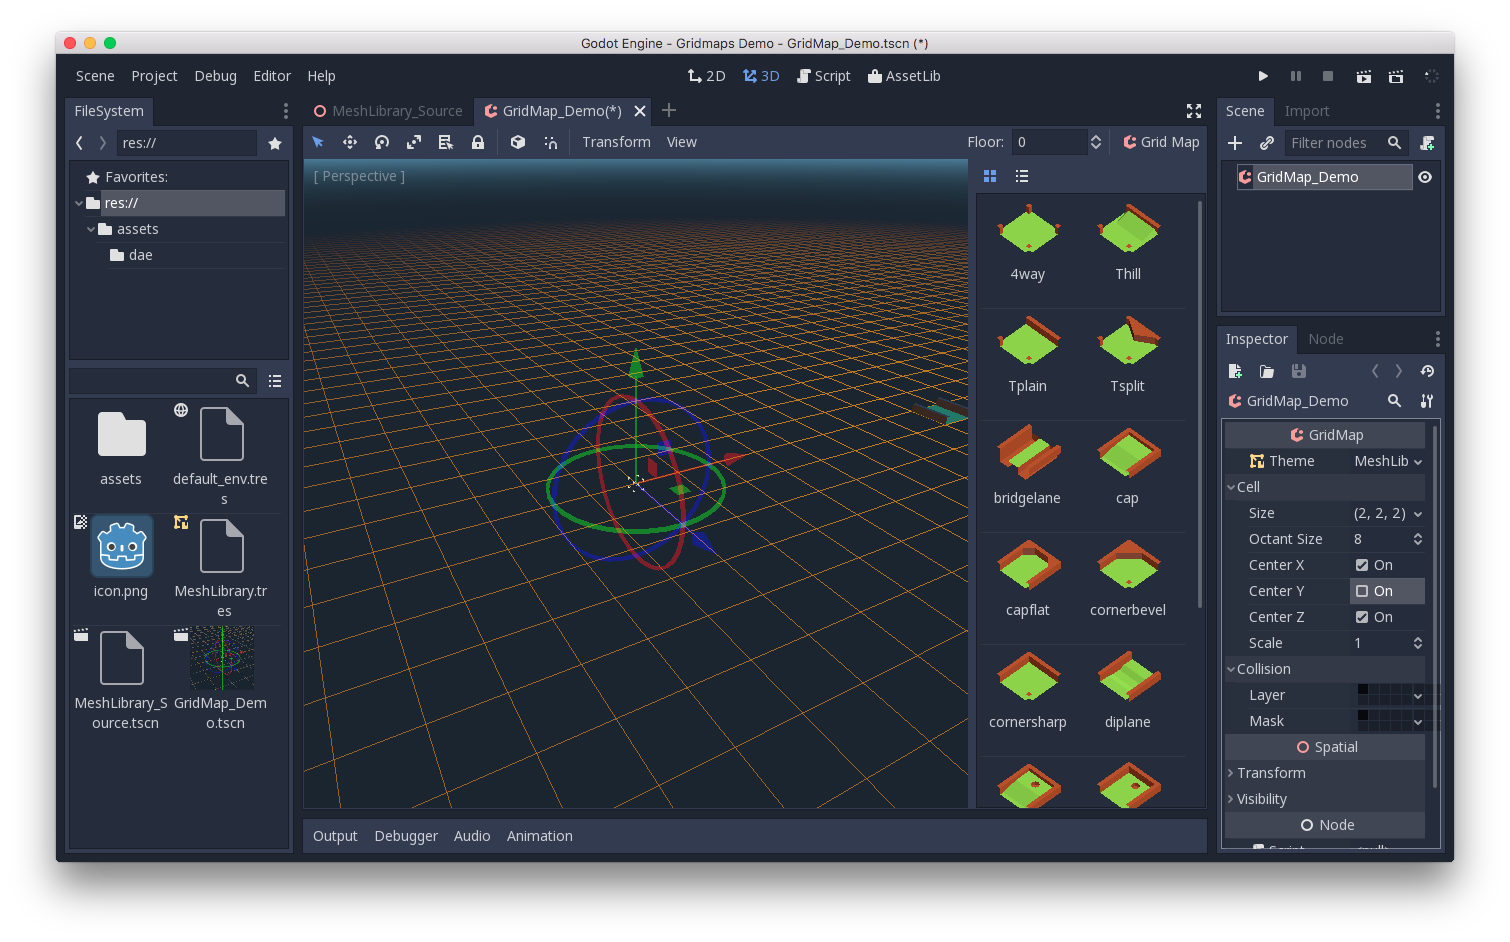
The "Cell/Size" property should be set to the size of your meshes. You can leave it at the default value for the demo. Set the "Center Y" property to "Off".
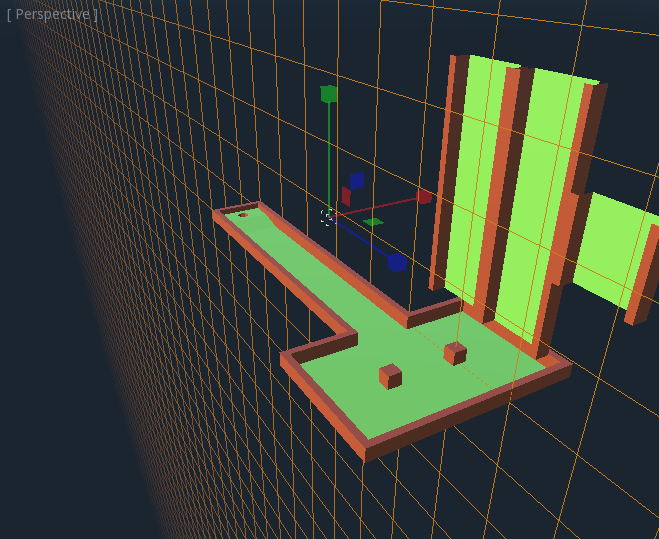
Now you can start designing the level by choosing a tile from the palette and placing it with Left-Click in the editor window. Use Right-click to remove a tile.
Use the arrows next to the "GridMap" menu to change the floor that you are working on.
Click on the "GridMap" menu to see options and shortcuts. For example, pressing
S rotates a tile around the y-axis.
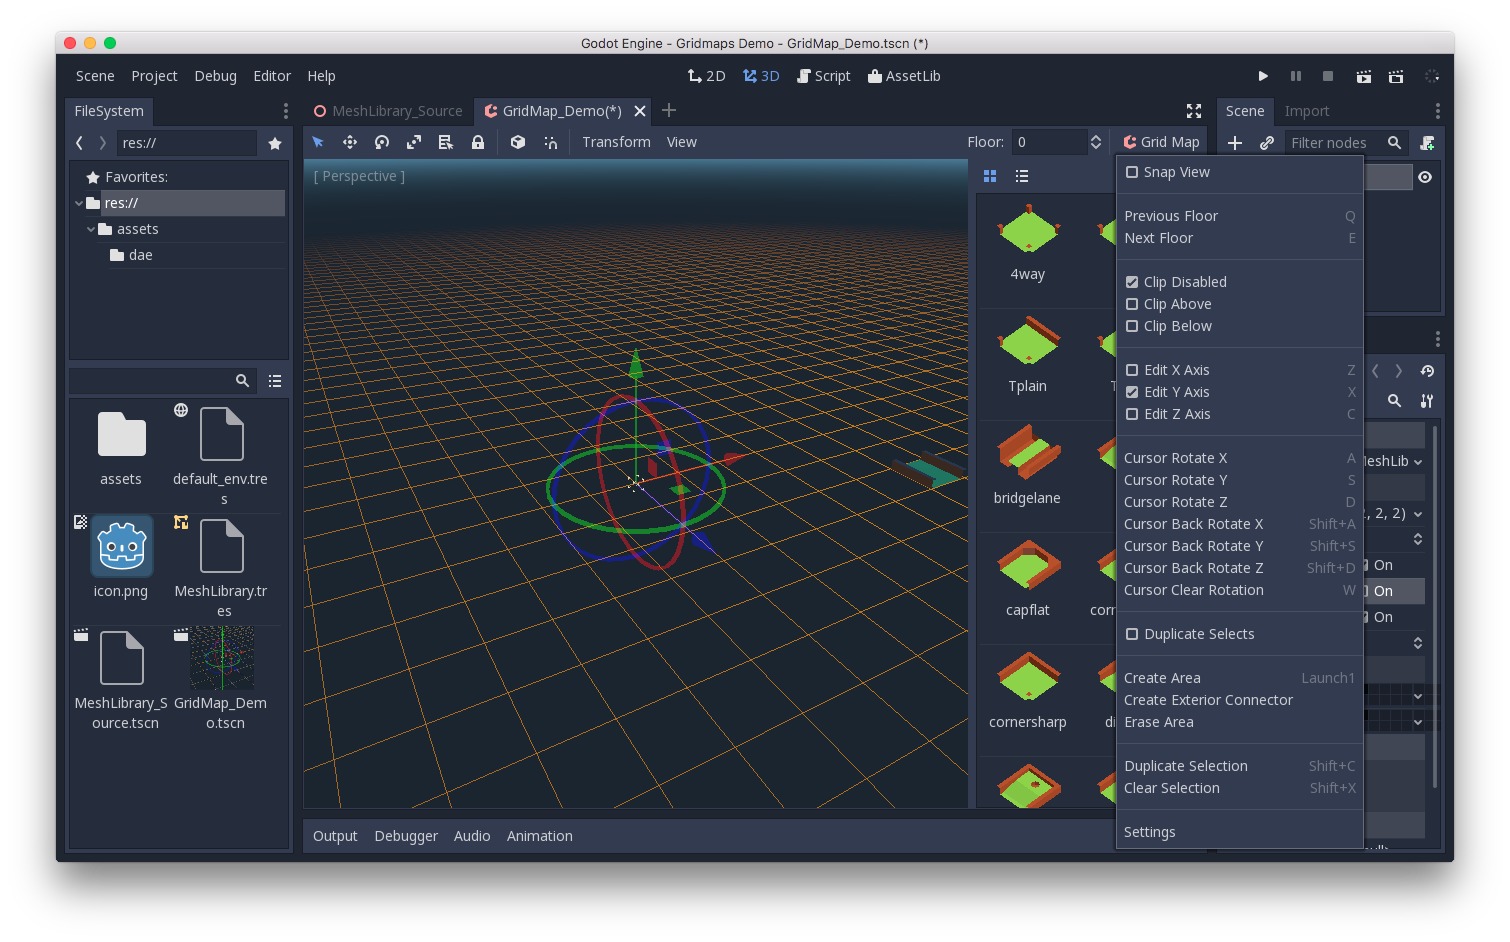
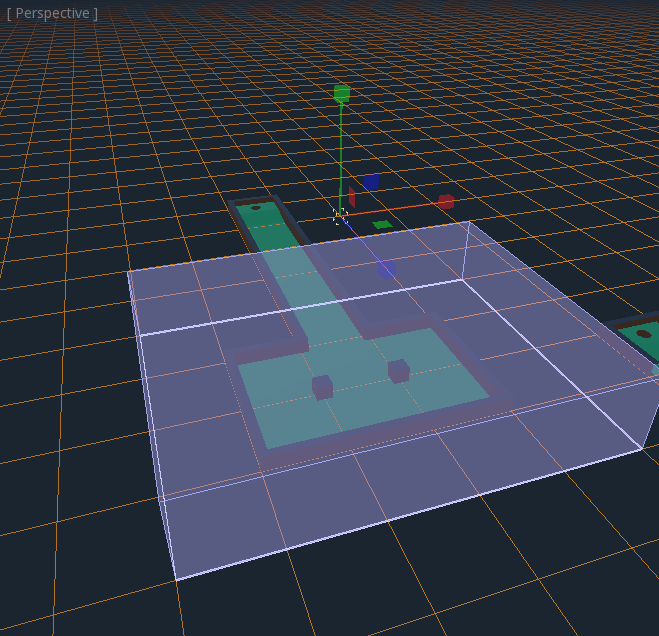
Holding Shift and dragging with the left mouse button will draw a selection
box. You can duplicate or clear the selected area using the respective menu
options.
In the menu, you can also change the axis you're drawing on, as well as shift the drawing plane higher or lower on its axis.
Using GridMap in code
See class_GridMap for details on the node's methods and member variables.